Nice work.
P-51D cockpit build
-
mer8771

- Staff Sergeant
- Posts: 442
- Joined: 23 Feb 2014, 12:49
- Location: 6 NM from KCHS off the end of rwy 33
- Contact:
Re: P-51D cockpit build
I'm jealous of your skill! 
Nice work.
Nice work.
Family, Friends, and I
are the most important things
in life. Always in that order.
Once you're faced with death you will no longer be scared of it.
Life has a new joy to it, cherish it.
Craig McN.
are the most important things
in life. Always in that order.
Once you're faced with death you will no longer be scared of it.
Life has a new joy to it, cherish it.
Craig McN.
Re: P-51D cockpit build
Thanks guys. I really appreciate your comments and support!
Ed
Ed

If at first you do succeed, try not to look too surprised!
Re: P-51D cockpit build
Hello everyone
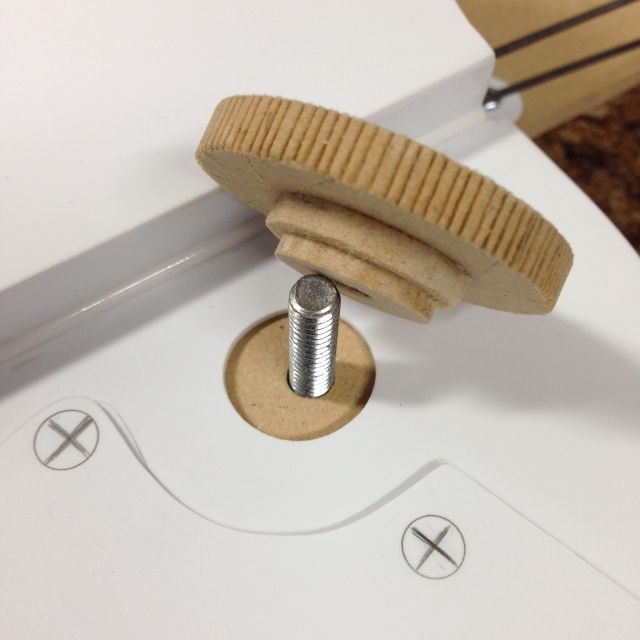
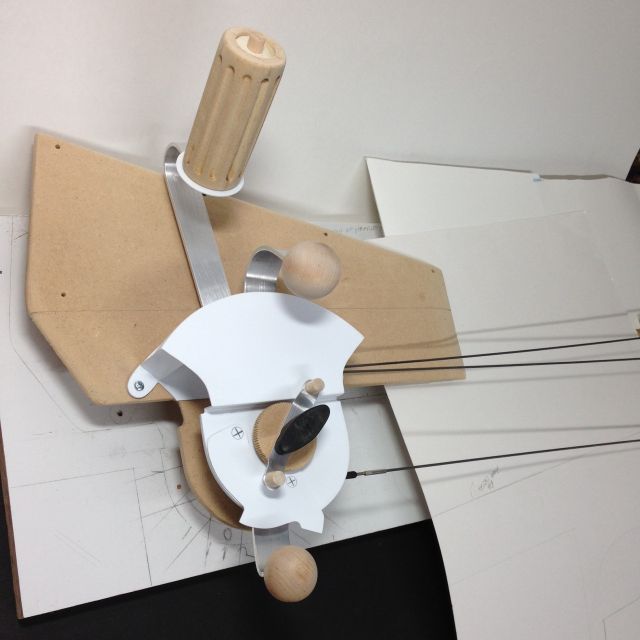
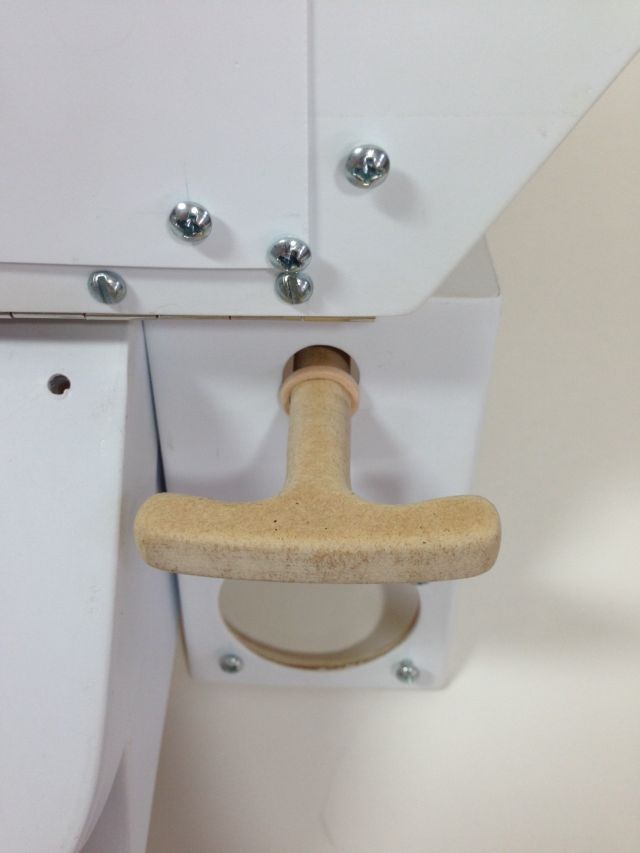
I thought I would start with clarification on yesterdays post. I mentioned that the round lock knob was undercut to allow the face plate to float and not bind but I did not add a picture. Here you can see the undercut that makes contact with the spacer below but lets the face plate float. I hope that helps.
Now, let’s try to get a handle on this project! Yeah. I know. My wife rolled her eyes and left the room when I told her.
To get started I glued up several ½ inch thick MDF pieces to get an oversize blank. I then trimmed the corners and sanded it round. Sorry, no pictures, just a lot of dust!
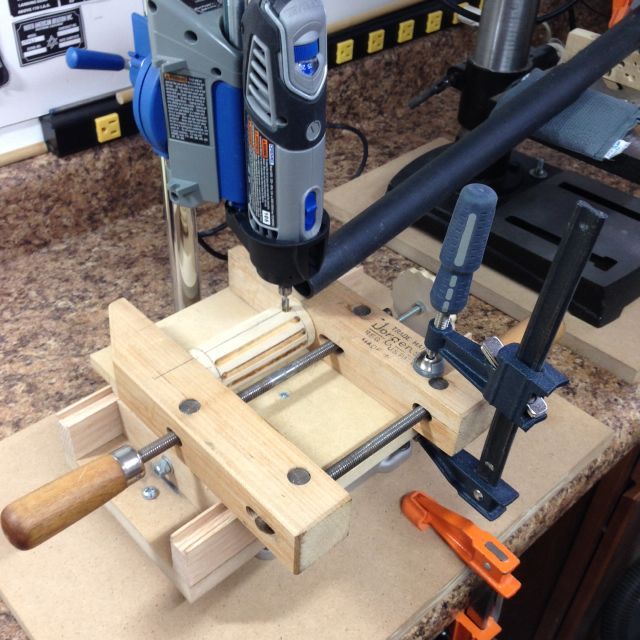
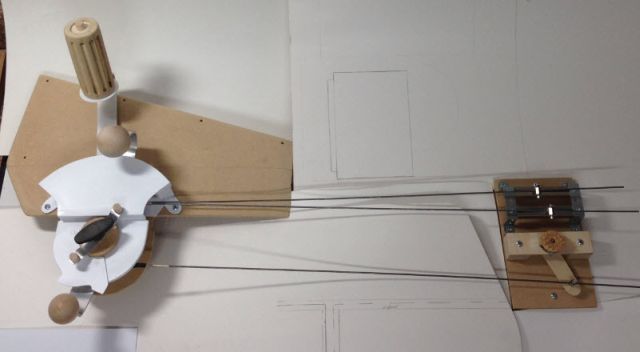
In case you are interested in how I proceeded after the dust settled I have included a pic. I clamped the blank to a sliding plate that I had made for my Dremel tool. I lowered the bit into the MDF then turned the crank you can see on the right side of the jig (to the right of the text on the clamp) to move the plate under the bit to one side. Then I raised the bit, rotated the blank and started over again. As they say, wash, rinse, repeat.
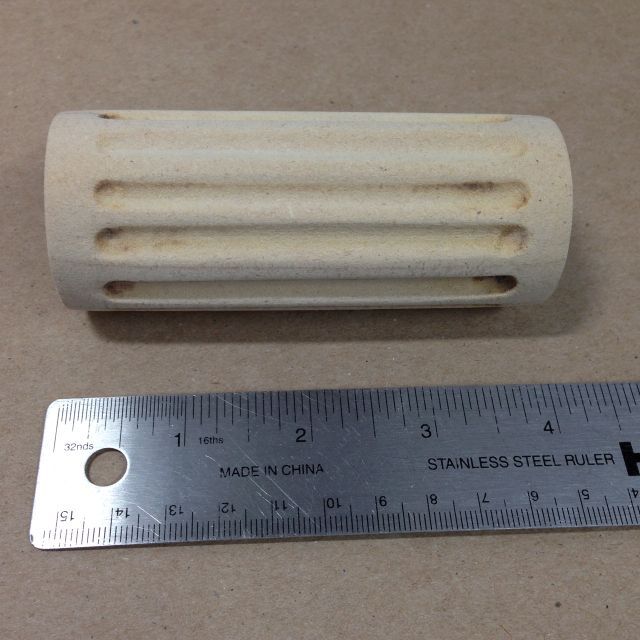
Here is the blank after its run through the Dremel tool and some sanding. (read more dust)
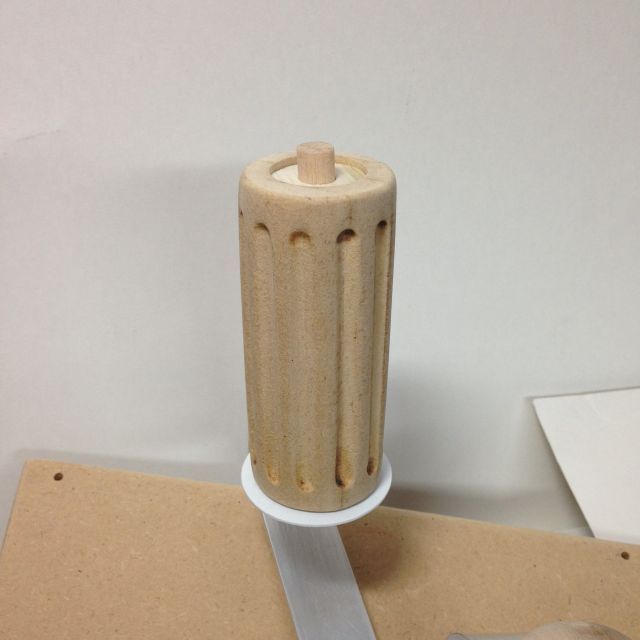
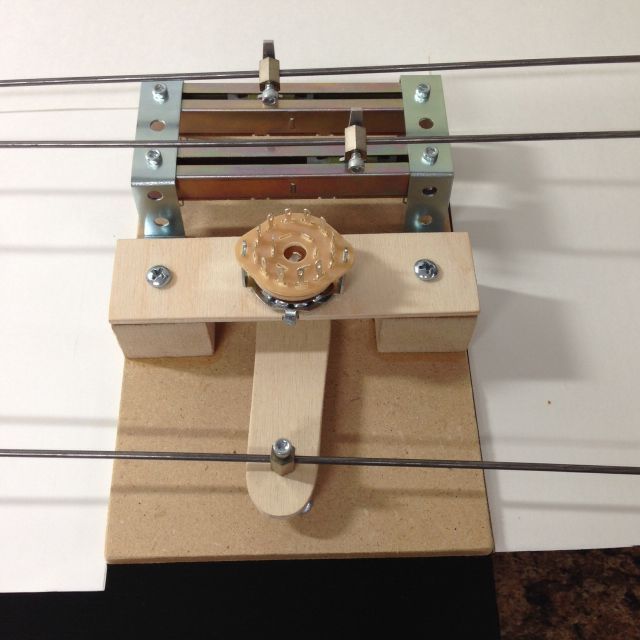
I drilled one end for a temporary PTT button until I get one ordered. Then I mounted the handle to the throttle arm.
Before installing the stop plate for the mixture lever I needed to set up the linkage. I used all 5 hands and 3 languages (in reality I only speak English but a few choice words that may have been other languages, maybe even Klingon, were employed) and got it all together without anything breaking. I then adjusted its movement so the lever swing matched the stop plate.
Thanks for looking and for rolling your eyes at the handle comment!
Ed
I thought I would start with clarification on yesterdays post. I mentioned that the round lock knob was undercut to allow the face plate to float and not bind but I did not add a picture. Here you can see the undercut that makes contact with the spacer below but lets the face plate float. I hope that helps.
Now, let’s try to get a handle on this project! Yeah. I know. My wife rolled her eyes and left the room when I told her.
To get started I glued up several ½ inch thick MDF pieces to get an oversize blank. I then trimmed the corners and sanded it round. Sorry, no pictures, just a lot of dust!
In case you are interested in how I proceeded after the dust settled I have included a pic. I clamped the blank to a sliding plate that I had made for my Dremel tool. I lowered the bit into the MDF then turned the crank you can see on the right side of the jig (to the right of the text on the clamp) to move the plate under the bit to one side. Then I raised the bit, rotated the blank and started over again. As they say, wash, rinse, repeat.
Here is the blank after its run through the Dremel tool and some sanding. (read more dust)
I drilled one end for a temporary PTT button until I get one ordered. Then I mounted the handle to the throttle arm.
Before installing the stop plate for the mixture lever I needed to set up the linkage. I used all 5 hands and 3 languages (in reality I only speak English but a few choice words that may have been other languages, maybe even Klingon, were employed) and got it all together without anything breaking. I then adjusted its movement so the lever swing matched the stop plate.
Thanks for looking and for rolling your eyes at the handle comment!
Ed
If at first you do succeed, try not to look too surprised!
-
Piper_EEWL

- Chief Master Sergeant
- Posts: 4544
- Joined: 26 Nov 2014, 14:14
- Location: Germany
Re: P-51D cockpit build
That's crazy Ed. Just amazing the level of detail you're incorporating. I wouldn't have the patience for this. I'm really jealous of your skills and passion! 
Thanks for sharing
Thanks for sharing
B377&COTS, J3 Cub, B-17G, Spitfire, P-40, P-51D, C172, C182, Pa28, Pa24, T-6 Texan, L-049&COTS, Bonanza V35B
Re: P-51D cockpit build
How do you make your panels? Is that plastic you are working with? I would love to see a tutorial on how you make your panels. Great job!

Re: P-51D cockpit build
Love your project. I'm from Vero but up in Nantucket now. Next time I am in Vero with my simpit van, might look you up and we can share notes and some flights.
i9-13900K O/C | ASUS ROG Maximus Z790 Hero | 32GB DDR5 6000MHz Kingston FURY | RTX 4090 24GB | 2x SSD M.2 (2TB Samsung 990 PRO) 1x SSD (4TB Samsung 870 EVO) | Windows 11 Home | H20: HydroLux PRO:HardLine Tubing| 1000w PSU
Re: P-51D cockpit build
Hi bdu981 and Kilstorm
Thanks for your comments!
The white panels are .020 or .040 styrene. On most I have added 1/8 plywood to the back for reinforcement to support the switches. The other panels are 1/8 inch plywood with solid wood edging.
I don't have a visual tutorial but the panels are a flat piece of plastic or wood and if a rounded edge is needed I add strips of plastic or solid wood to the back edge. This can be lightly sanded to provide a rounded edge which simulates a stamped metal panel. The radiator panel is one of my early builds. This one is plastic with a wood backer for support. On this panel I heated the edge then curved it to simulate a stamped panel. If I were to do it again I would use a flat panel and add plastic strips to the edges. Heating the plastic is not an exact science for me and too little or too much heat can effect the bend and the condition of my fingers!
Kilstrom it would be great to see your system. Mine is not flying yet and even when complete will not get more that 31 feet above sea level (Florida is not known for altitude!) and for speed, how fast can you push several hundred pounds on casters? Let me know when you are in the area.
Take care
Ed
If at first you do succeed, try not to look too surprised!
-
Killratio

- A2A Spitfire Crew Chief
- Posts: 5785
- Joined: 29 Jul 2008, 23:41
- Location: The South West of the large island off the north coast of Tasmania
- Contact:
Re: P-51D cockpit build
Absolutely brilliant!
<Sent from my 1988 Sony Walkman with Dolby Noise Reduction and 24" earphone cord extension>

Re: P-51D cockpit build
Hello everyone. I hope you are all doing well.
A quick update for the fuel selector and ignition components. I have been looking for knobs for these items and came up empty so today I made them. As noted previously I have removed the ignition switch from the Saitek Panel and will install it in the center switch box I built. For the fuel selector I am using a rotary switch.
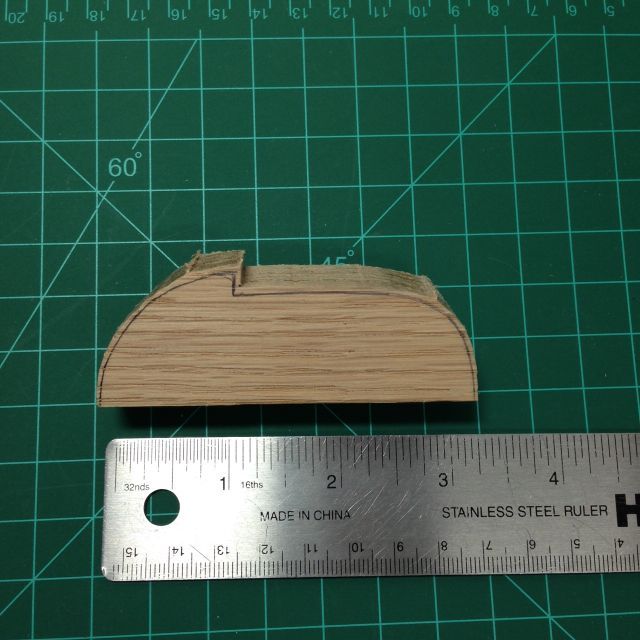
The first pic shows the fuel selector roughed out. I used the same procedure for the ignition but do not have a pic. I wanted strong knobs for both devices (don't ask me why ) so I used Oak from my scrap bin. Do you know why Oak is in the hardwood family? Guess!
  I have used Oak on projects in the past but they were furniture items not small knobs that had to be shaped. Well, I wanted strong knobs and I have them! I'll rethink Oak for small items in the future!
Take care
Ed
Both knobs near completion.

And a quick test fit.
A quick update for the fuel selector and ignition components. I have been looking for knobs for these items and came up empty so today I made them. As noted previously I have removed the ignition switch from the Saitek Panel and will install it in the center switch box I built. For the fuel selector I am using a rotary switch.
The first pic shows the fuel selector roughed out. I used the same procedure for the ignition but do not have a pic. I wanted strong knobs for both devices (don't ask me why
Take care
Ed
Both knobs near completion.
And a quick test fit.
If at first you do succeed, try not to look too surprised!
-
Tomas Linnet
- Senior Master Sergeant
- Posts: 2286
- Joined: 05 Nov 2013, 10:48
- Location: Oksboel, Denmark
Re: P-51D cockpit build
Amazing work!!!
Kind Regards
Tomas
Sim: FSX SE
Accu-Sim aircraft in my hangar:
C172, C182, P51 Civ, P51 Mil, B17, Spitfire, P47, B377 COTS,
J3 Cub, T6, Connie, P-40, V35B
A2A Accu-Sim Avro Lancaster Loading:............0.000003% complete, please wait.
Tomas
Sim: FSX SE
Accu-Sim aircraft in my hangar:
C172, C182, P51 Civ, P51 Mil, B17, Spitfire, P47, B377 COTS,
J3 Cub, T6, Connie, P-40, V35B
A2A Accu-Sim Avro Lancaster Loading:............0.000003% complete, please wait.
Re: P-51D cockpit build
Thanks Tomas!
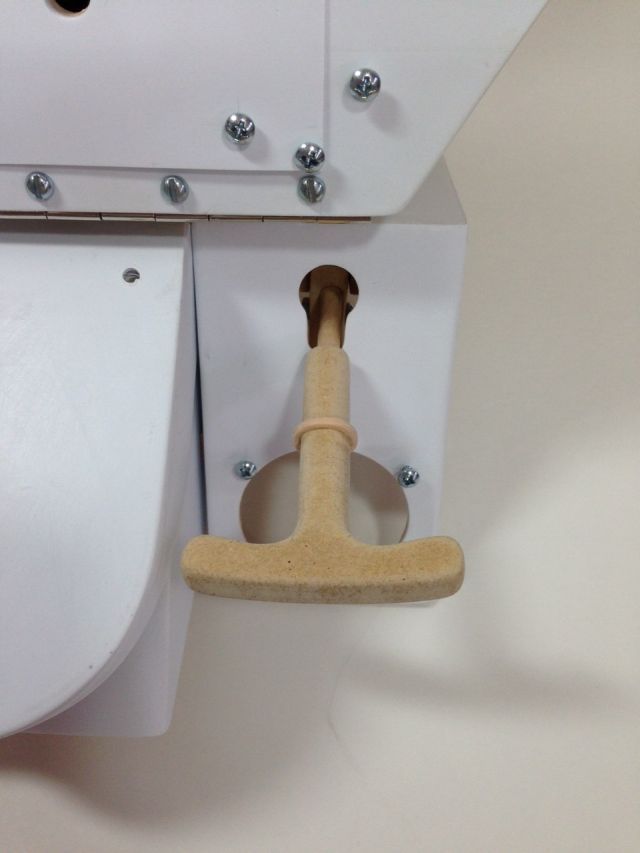
Well today was spent on handles and switches. I had made the parking brake handle a while back but had not constructed the box to hold the switch. It’s nothing fancy as it will be behind the MIP frame out of site.
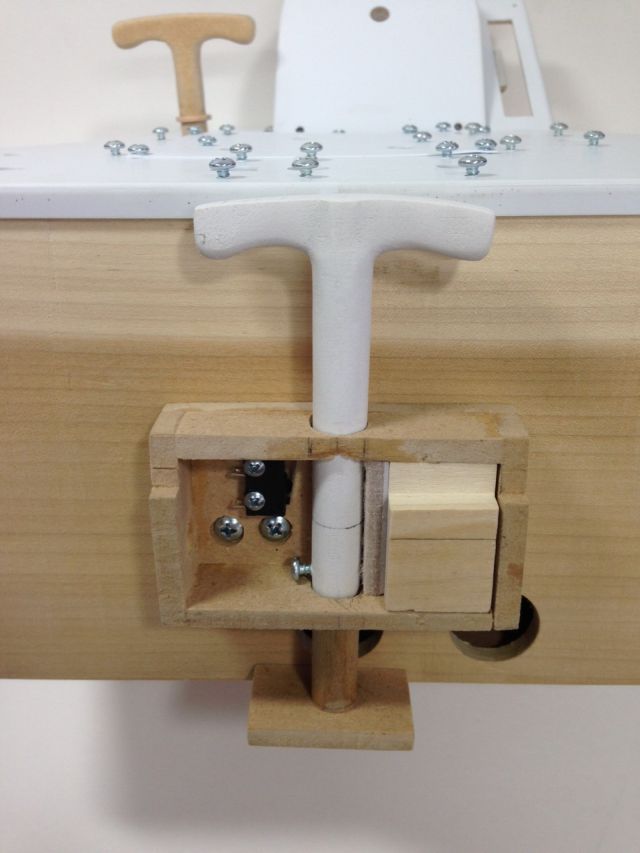
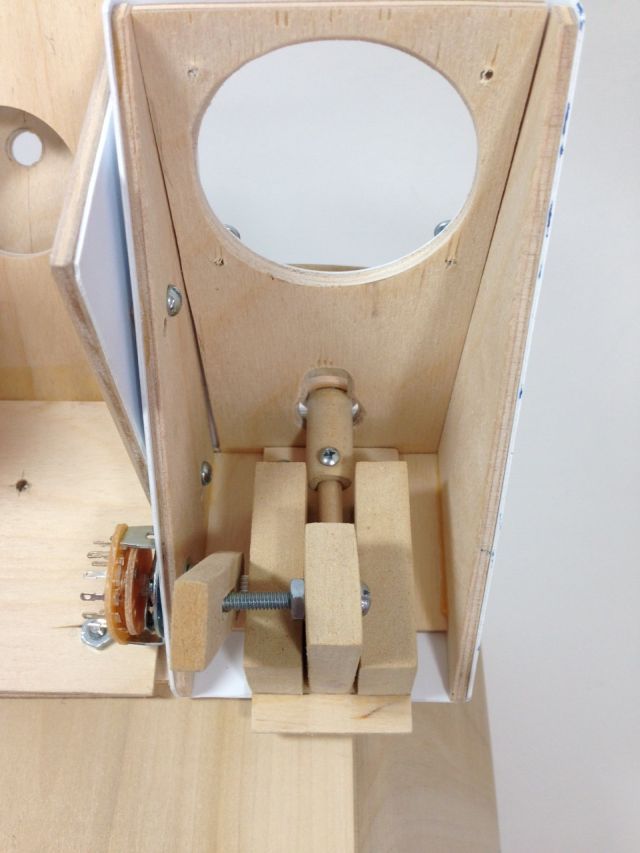
While figuring out how to make this work I realized I needed to add more length to the handle. Instead of cutting more plastic to match the original I just spliced in a wood dowel. I also added a stop plate to the end. This also keeps it from turning. The block of lighter wood in the box exerts pressure on a felt pad creating friction which gives the handle some resistance.
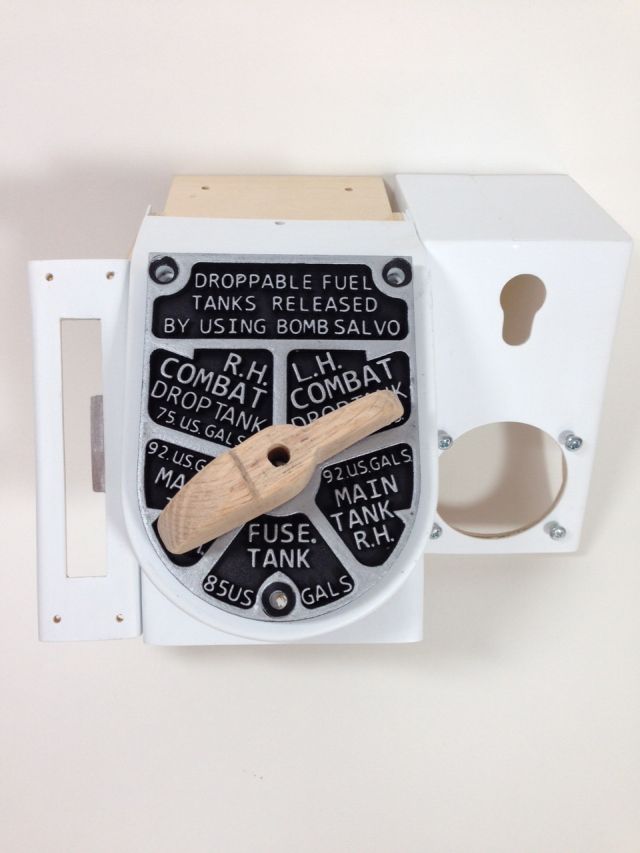
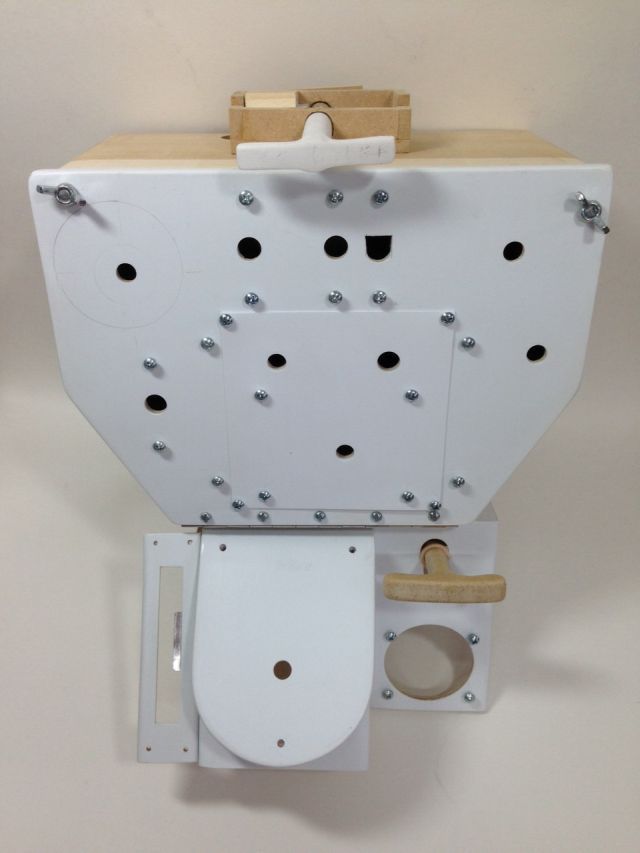
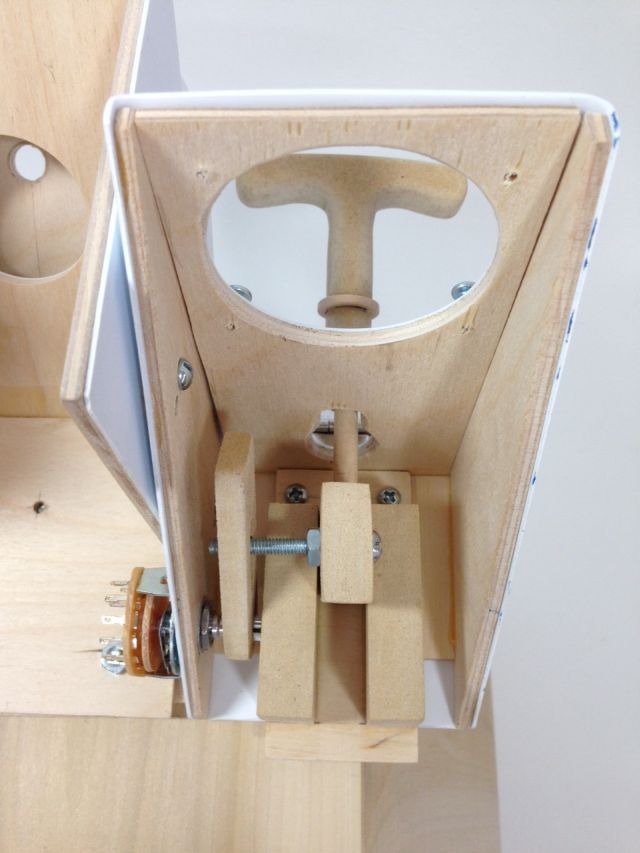
In the first pic the handle is retracted. In the second it is pulled out allowing the screw to make contact with the lever switch. The third pic is just a front view of the parking brake assembly and you can see the emergency hydraulic release in the lower right.

Starting from scratch on the emergency handle, and remembering my experience with the last two knobs, I went to my scrap box and picked out a piece of Oak. I then opened the door and gave it a good throw towards the pond just missing a duck. NO OAK THIS TIME!
For this handle I went with MDF which is much easier to work with yet strong enough for this function. I then installed a rotary switch and proceeded to construct the mechanism. It appears that the handle pulls out then drops down into the lower notch in the face plate.
To make this happen I mounted 2 MDF braces on 1/8 plywood and installed that into the unit. Another piece of MDF is mounted on the handle extension. This moves back and forth and up and down between the braces. A bolt extending into a slot in a lever on the rotary allows for the up/down motion while moving the lever actuating the switch.
Thanks for looking.
Take care
Ed
Well today was spent on handles and switches. I had made the parking brake handle a while back but had not constructed the box to hold the switch. It’s nothing fancy as it will be behind the MIP frame out of site.
While figuring out how to make this work I realized I needed to add more length to the handle. Instead of cutting more plastic to match the original I just spliced in a wood dowel. I also added a stop plate to the end. This also keeps it from turning. The block of lighter wood in the box exerts pressure on a felt pad creating friction which gives the handle some resistance.
In the first pic the handle is retracted. In the second it is pulled out allowing the screw to make contact with the lever switch. The third pic is just a front view of the parking brake assembly and you can see the emergency hydraulic release in the lower right.
Starting from scratch on the emergency handle, and remembering my experience with the last two knobs, I went to my scrap box and picked out a piece of Oak. I then opened the door and gave it a good throw towards the pond just missing a duck. NO OAK THIS TIME!
For this handle I went with MDF which is much easier to work with yet strong enough for this function. I then installed a rotary switch and proceeded to construct the mechanism. It appears that the handle pulls out then drops down into the lower notch in the face plate.
To make this happen I mounted 2 MDF braces on 1/8 plywood and installed that into the unit. Another piece of MDF is mounted on the handle extension. This moves back and forth and up and down between the braces. A bolt extending into a slot in a lever on the rotary allows for the up/down motion while moving the lever actuating the switch.
Thanks for looking.
Take care
Ed
If at first you do succeed, try not to look too surprised!
-
Lewis - A2A

- A2A Lieutenant Colonel
- Posts: 33320
- Joined: 06 Nov 2004, 23:22
- Location: Norfolk UK
- Contact:
Re: P-51D cockpit build
wow, just amazing. Its like a master class in how to best use all those woodwork skills from school, lol much better than making a shelf and an ash tray lol 
cheers,
Lewis
cheers,
Lewis
A2A Facebook for news live to your social media newsfeed
A2A Youtube because a video can say a thousand screenshots,..
A2A Simulations Twitter for news live to your social media newsfeed
A2A Simulations Community Discord for voice/text chat
A2A Youtube because a video can say a thousand screenshots,..
A2A Simulations Twitter for news live to your social media newsfeed
A2A Simulations Community Discord for voice/text chat
Re: P-51D cockpit build
Thanks Lewis.
My shelf fell off the wall and my ash tray caught fire!
Ed
My shelf fell off the wall and my ash tray caught fire!
Ed
If at first you do succeed, try not to look too surprised!
Re: P-51D cockpit build
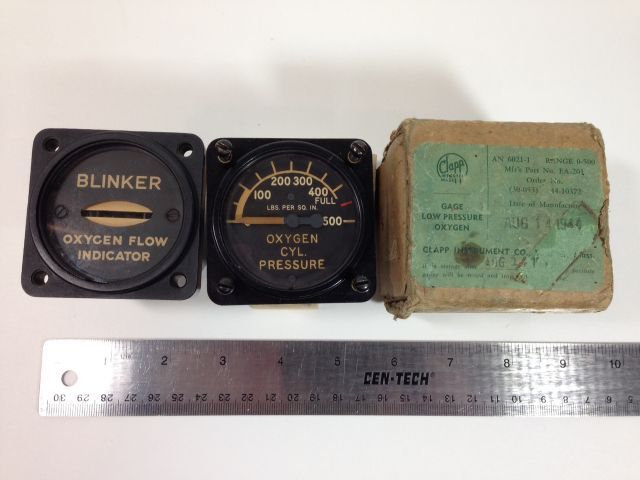
Got a nice surprise in the mail today!
The blinker works as I thought it would with the "eye" opening and closing with very low pressure. I'm not sure about the pressure gauge but it will only be for looks so it's not important. I was surprised the pressure gauge arrived in its original box showing a manufacturing date of 1944!
I think I may have a way for the blinker to function. (Think being the key word here) Only time will tell.
Take care
Ed
If at first you do succeed, try not to look too surprised!

Re: P-51D cockpit build
Wow! OG! That's so rad. They have such an amazing presence. And, the history they are connected to makes it a trip.
Right on. I commend you sir.
Your craftsmanship is pretty good to :;): [THUMBS UP SIGN]
Right on. I commend you sir.
Your craftsmanship is pretty good to :;):
Who is online
Users browsing this forum: No registered users and 34 guests